I was chatting with a friend a few days ago about The Simpsons. (We are both big fans!) Apparently, in the early episodes of The Simpsons, Sideshow Bob communicated only by using a slide whistle. This type of whistle is often used in animated cartoons and my Dad tells me that it can regularly be heard in classic comedies, such as Laurel and Hardy.
As bushcrafters often carry a whistle, I thought it might be a bit of fun to make a fairly simple variation of the classic slide whistle (also known as a Swanee or Piston Flute).Those who have had a go at making a regular whistle will have noticed that a smaller hollow will give a higher frequency. By having a plunger (piston) within the hollow, you can alter the chamber size, and this in turn affects the pitch or sound!
You will need:
- Some dry elder wood
- A sharp knife (Be careful and remember knife safety!)
- Fine sandpaper
- Length of paracord or handmade cordage.
Here’s how:
- Take a length (about 100mm long) of dry, straight, elder. You could use ‘green’ but it would stop working as the wood dries out and shrinks. Elder is a great choice as it has a large soft pith which, when removed, gives us a ready-made chamber!
- Push out the pith with a stick. You need to make sure it is all out and that the sides of the inside chamber are fairly smooth; otherwise, you will struggle to get a good seal with your plunger/piston.
- You now need to find a short length of wood the same diameter as the hollow and say 10mm – 15mm long. This is the plug to the mouthpiece. A little trimming to size may be necessary. Once you have made the plug, shave off a small channel to blow into. (See picture.) Once this is in place, you can carve the end to form a mouthpiece; it should look a bit like a recorder.
- The next step is to cut the sound hole; this is probably the most critical part. As in the picture, cut a steep notch. (Aim for just below 90°.) Then cut into this at a shallower angle. This creates a sharp lip. At this point you can test the whistle by placing your finger over the end and blowing. If the sound is poor, you may have to adjust the notch, or move the wooden plug we inserted into the mouthpiece backwards or forwards until you are satisfied with the sound. (We wouldn’t want it sounding like a Vuvuzela, now; would we?)
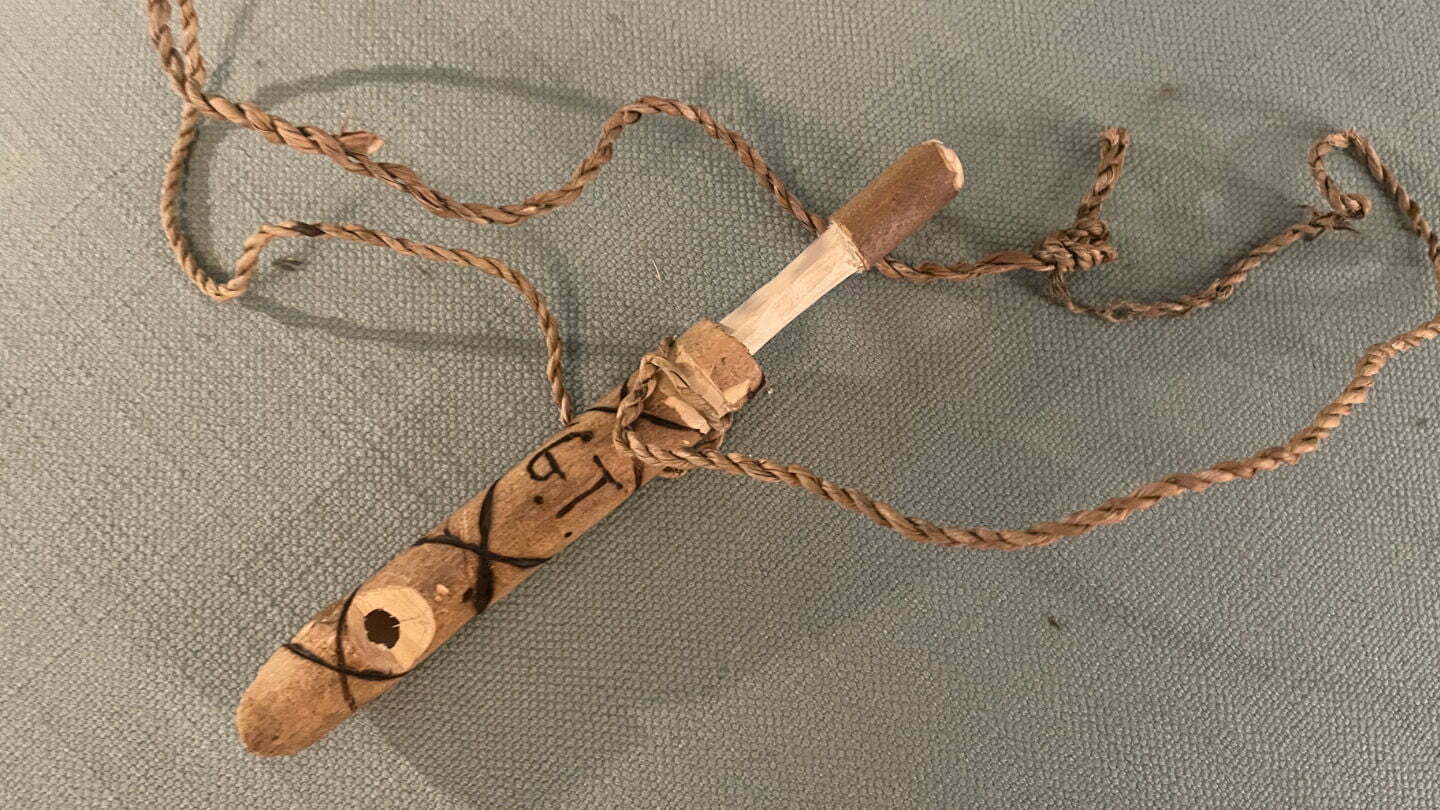
- Now we must make the plunger. It can be a little tricky to get this right, as it needs to give a good seal, but also needs to be able to slide up and down the chamber. To make the plunger easier to slide, I carefully carved and sanded my plunger to fit the chamber but I left a knob on the end which was equal in diameter to the main part of the whistle and about 10mm – 15mm long. This knob will act as a seal to the chamber and also allows you to grip it nicely. Hollowed out Using your fine sandpaper, carefully adjust the size of the plunger by small amounts at a time, until it fits nicely inside the chamber.
- Once you are happy with the plunger, you are ready to go! Using my bushcraft knife and some sandpaper, I neatened things up, and then did some decoration with some wire heated in the fire, before adding a piece of cordage.